I recently purchased a Beholder Lite camera gimbal for my DJI Phantom quadcopter, and I am very pleased with it. Bottom line for those that don’t want to read this entire post… The Beholder Lite is hard to beat for the price, as long as you have some time to tune the gimbal. Output video is very steady when flying reasonably, and still images are far more crisp than they are without a gimbal. The final output is not quite as good as the H3-2D Zenmuse, but it is still much more than acceptable. Plus, you can buy almost 4 Beholder Lite’s for the cost of one Zenmuse. However, when flying aggressively, there is a lot of vibration. Read more for an explanation, pros & cons, plus tips for set up and some sample videos.

Background
Um… What is a camera gimbal?
First, a gimbal is: “a pivoted support that allows the rotation of an object about a single axis. A set of three gimbals, one mounted on the other with orthogonal pivot axes, may be used to allow an object mounted on the innermost gimbal to remain independent of the rotation of its support.”
A camera gimbal is a set of these gimbal supports that enables the camera’s movement to be independent from the support structure. In this case, the camera gimbal allows the camera’s orientation to be independent from the orientation of the helicopter. Check out this video for more detail:
The Beholder Lite Gimbal
The Beholder Lite gimbal is a direct-drive brushless gimbal. This means: 1) the motors are brushless motors, and 2) that the motors directly drive the support arms for the gimbal; there are no servo arms or other moving parts in the gimbal assembly. Brushless motors are faster than traditional/brushed servo motors, so they offer a smoother response and better stabilization. I have used the Phantom with no gimbal, as well as with a brushed/servo gimbal, and the brushless direct-drive gimbal is by far the best quality.
I mentioned that I am very happy with this gimbal, though it has not been without its own hiccups.
Pros:
- Very stable footage ****once properly installed and tuned****
- Still images are more crisp
- Videos are far more stable, though aggressive flying will cause significant vibration (this happens with all gimbals, though some more than others)
- Very affordable compared to similar gimbals on the market.
Cons:
- Installation instructions are not very good. They are based on pictures only, and do not clearly identify motor orientation or wiring. I originally had the motors in the wrong direction, and the motor polarity reversed. This third-party post (with video) was very helpful for installation. I’ve provided additional installation details at the bottom of this post.
- The gimbal is marketed as “ready to go” - you just assemble it and start flying. Once assembled, I had lots of vibration to the point of being unusable. I seriously considered returning it. However, I had to manually change settings before I could get some decent footage. This was both physical (in the mounting), and in software configuration. I had to adjust the output gains before the gimbal would provide stable footage (details below).
- The vibration absorbing mounts are too soft. You will get vibration from the camera oscillating below the copter. Luckily this can be corrected but sticking some foam ear plugs inside the vibration mounts (see details below).
Both aggressive flying and high-wind environments will cause additional vibration in both the copter and gimbal, so keep those in mind when you are filming.
Sample Video Footage
I still don’t feel like I have the gimbal settings (gains) 100% dialed-in, but I have it close enough to get some high quality footage. I have found that the 1080p@60fps video mode on the GoPro camera has the best results. 2.7K@30fps has too much rolling shutter effect for the footage to be really usable. I also have not balanced the propellors on my copter, which will also help to eliminate vibration. Here are a few samples from the camera/gimbal combination. All of this footage was captured with a GoPro Hero 3 Black Edition.
1080p@60fps with Post Processing via Adobe Premiere: I still think I can get it more stable by changing a few editing parameters and changing the sequence of my scaling and effects, but I am very happy with this output.
1080p@60fps Non-Stabilized: “Day for night” color correction, non-stabilized, GoPro with ND filter, just for fun…
2.7K@30fps with 10% Warp Stabilization The footage is far better than it is without a gimbal, but there’s still some rolling shutter effect evident (capturing Tony’s hex liftoff).
Aggressive Flight: This footage is completely raw, without any post-processing or stabilization. This shows output when flying aggressively. This was *very* aggressive flight - full speed in ATTI mode. I recommend that you *never* attempt to shoot professional footage flying like this:
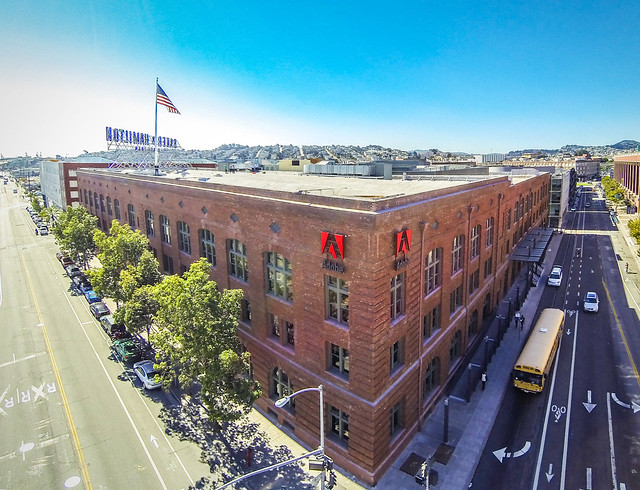
Sample Still Images & Compositions
Here are just a few still images and compositions captured with the Beholder Lite gimbal. You can see more on my Flickr page.

Installation Details
In addition to the gimbal’s manual, I strongly recommend that you read both of these posts and watch the videos for detailed installation instructions:
- http://www.fpvguy.com/2013/08/beholder-lite-175-brushless-gimbal-build.html
- http://www.fpvguy.com/2013/08/beholder-lite-175-brushless-gimbal-build-part-2.html
Pay particular attention to motor orientation and wiring. The motors look symmetrical, but their weight and operation is not. The pitch motor should have the wire coming out the side that is closest to the copter. The roll motor should have the wire coming out the side closer to the camera. If you have your motor polarity reversed, you’ll know b/c the gimbal will vibrate back and forth. This won’t hurt it, and you can just reverse the wires easily if this happens. In the picture below you can see my motor orientation:

Very important: make sure your gimbal is balanced. If the power is off, the GoPro should not fall in any direction. It should just stay where it is. Having it perfectly balanced is key to having smooth footage.
The rubber vibration dampeners are too soft for the gimbal. If you fly it “stock”, you will get a TON of vibration from the gimbal oscillating under the copter. Use some soft foam earplugs, roll them up, and put them inside of the dampeners. I used the cheap foam orange ones you get from any drug store, and they work great. I put one in each of the 6 vibration dampeners. Another picture below, so you can see the orange ear plugs in the dampeners:

Once your gimbal is powered up, if you have vibrations while the copter motor isn’t even running, then you need to adjust the gains and tune the gimbal itself. I had to do this. You can connect using a standard micro USB cable (from any Android phone), and use the software here: https://code.google.com/p/brushless-gimbal/downloads/detail?name=BruGi_049B_r161.zip&can=2&q= and drivers here: http://www.silabs.com/products/mcu/pages/usbtouartbridgevcpdrivers.aspx (windows only)
Not entirely necessary, but I also put Moongel in between the gimbal and the copter body to absorb vibrations, and I also put it on top of the gimbal’s gyro board to absorb vibrations that may affect gimbal orientation (see picture below).

Do not get the white wires too close to the power wires or to the motors. They are very light weight, and can get interference from power wires, motors, and motor wires. You will get inexplicable vibrations if this occurs.
One last thing… If you use zip ties on the gimbal for extra safety, keep them very loose. If you compress the dampeners, the bottom plate will hit the controller board, and cause significant interference with gimbal operation. Everything will be fine one second, then completely out of control the next.
Battery Life
Before having a gimbal, I could easily get 12+ minutes of flight time per battery. With a servo-based gimbal, I could get about 10+ minutes per battery. With the Beholder Lite, I get a max of 8 minutes per battery. I set a timer for 7 minutes, and be sure to bring it down as soon as the time goes off. However, this seems comparable to battery life with other brushless gimbals that friends/coworkers use. The decreased battery life is due to additional weight of the gimbal, plus the additional power consumption from the gimbal motors.
What Next?
Use Creative Cloud to process all of your video and images to make them the best they can be! Here are some very useful posts for processing your content with this configuration (or similar configurations)…
Videos from Russell Brown:
- Lens Profile Correction with GoPro Hero 3 Cameras
- Color Correcting GoPro Images
- Creating a Panorama from a Video File
- Panorama Horizon Correction with Adobe Photoshop
- Noise Removal from GoPro Hero 3 Images
- Creating Aerial Panoramas from GoPro Hero 3 Images
- Adding a Tilt Shift Lens Blur to Aerial Photos for Special Effect
- Creating Vertical Panoramas with Adobe Photoshop
- Color Correction Video with Adobe Photoshop CC
Videos from Colin Smith:
- Stabilizing Camera Shake in After Effects CC
- Getting Rid of Lens Distortion in Photoshop CC
- The Basics of Editing Video in Photoshop (and adding cinematic color effects)
And have fun!